Process Journal
March 24, 2014
Brainstorming
Top 3 Choices:
Make a dress: I will learn how to design dresses, how to choose the fabrics, and finally how to sew them. I will accomplish a well done dress. I will be able to say that I invented, designed, and created a dress by myself. I want to have a little more experience in the fashion world, and get to experience the process that fashion designers go through.
Learn how to sew, stitch, and patch: I will learn and master the three basic seam skills, sewing, stitching, and patching. I will accomplish a 3 products that have to do with each one of the skills. I will be able to say that I learned 3 different seam skills, and that now I can consider myself a seaming expert. I am into fashion, completing this project would take me to another level in the fashion world.
Organize my own runway show: I would not only be learning about the fashion industry and how does it work, but I will also improve my organization and leadership skills. I will accomplish a whole event that would be entirely created by me. I would be able to say that after all the hard work, I was able to enjoy and watch the show. This would be something that involves entirely different skills that I would have to put in practice to achieve it, and also It would be very personal in a way.

April 2, 2014
Making The Final Decision
Deciding: Deciding which idea to do, was a challenge. All of my three ideas are about fashion, only that each one is about a different part of fashion, though I tried to think of a project that would combine all of my three ideas, I couldn't think of something that would be achievable in 9 months. The first idea that I eliminated was the making a dress project, though this would help me in a lot of ways, and the final product might turn out really nice, I thought this project was too common, and I wanted something that would challenge me more. Then, I was left with my top 2 choices, and though I really liked the runway project, I thought that the idea wasn't well structured due to that I didn't even know anything about runway shows, or what kind of clothes would be shown there, I also thought that I would need a lot of external help. So at the end I was left with my top 1 choice which was to learn how to sew, stitch, and patch. I still have doubts about this project, due to that I don't know if I will be able to achieve one product for each skill, but the good thing is that to accomplish the three projects I will be using three books that tell you step by step how to do them.
S.M.A.R.T. Goal: I will learn to sew, stitch, and patch, following tutorial books, in order to accomplish three products that feature each of the skills, by mid September.
April 12, 2014
Change In The PP
Change in PP: Today while looking at the book manuals, I realized how hard it was to accomplish a well done product, and how different the three skills where. I started doubting if I would be able to accomplish three well done products by mid September, specially if I where required to learn three different skills. I finally decided to just learn one skill and create three different projects each one with a different level of difficulty. I choose to learn to sew, due to that it's like the center of all the skills, and that to learn and master patching and stitching, you also need to learn the sewing basics. Finally, what I want to accomplish are three different products from the book each one with a different level of difficulty, I will start with level one, and as I get better I will get up to level three.
New S.M.A.R.T. Goal: I will learn to sew by following a tutorial book, in order to accomplish three products involving sewing, each one with a different level of difficulty by October.
Global Context: Personal and cultural expression
Product: Three products that feature sewing, chosen from a sewing book.
April 15, 1014
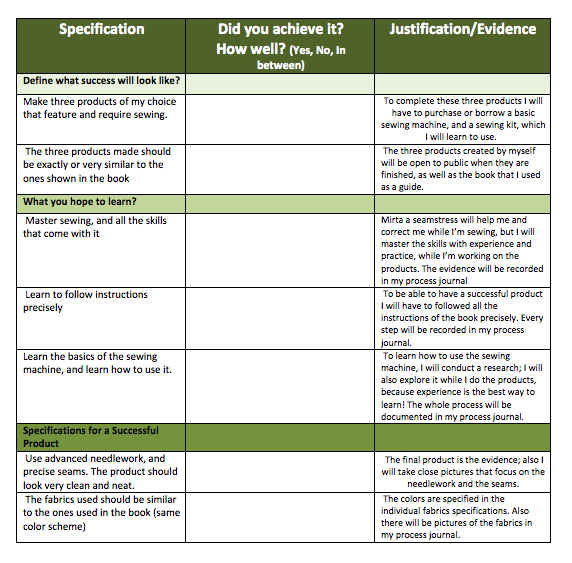
Making The Design Specifications
Making The Design Specifications
May 3, 2014
Choosing The Products
Level 1 Products:
Level 2 Products:
Level 3 Products:
Final Desicion:
Level 1 - Lavender Bags
Level 2 - Coat Hangers
Level 3 - Quilted Hottie
Choosing The Products
Level 1 Products:
- Needle case and Pincushion
- Padded Placemats
- Lavender Bags
- Bath Hat
- Ipod Case
Level 2 Products:
- Coat Hangers
- Girl's Apron
- Bird Mobile
- Jewellery Roll
- Oven Glove
Level 3 Products:
- Floor Cushion
- Cot Quilt
- Quilted Hottie
- Knitting Bag
- Heart Quilt
Final Desicion:
Level 1 - Lavender Bags
Level 2 - Coat Hangers
Level 3 - Quilted Hottie
May 5, 2014
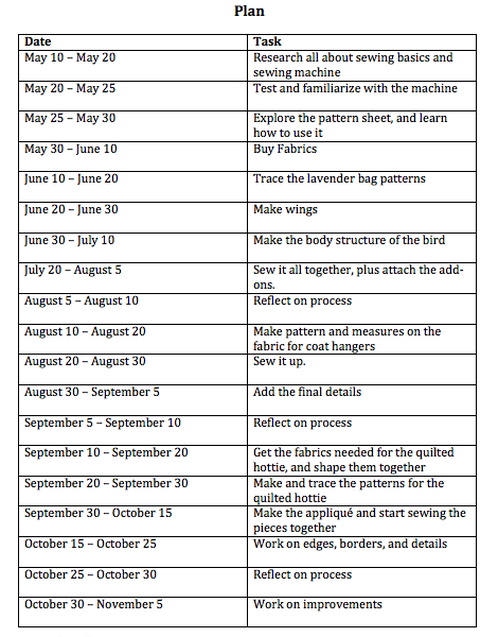
Doing The Plan
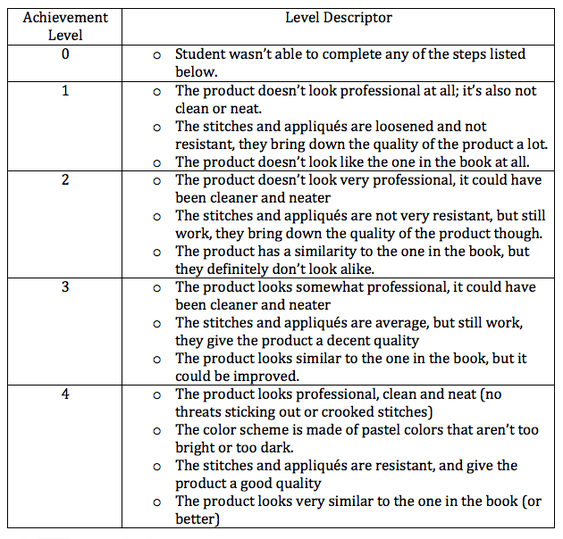
Criteria to Evaluate Products in Looks
Outstanding: The product looks exactly or better than the model shown in the book
Good: The product looks similar to the model shown in the book
Fair: The product doesn't look that much like the model shown in the book
Poor: The product looks nothing like the model shown in the book, and doesn't look attractive at all.
Criteria to Evaluate Products in Quality
Outstanding: The product has an excellent quality, and works properly
Good: The product has a good quality, and works
Fair: The product has a satisfactory quality, and doesn't quite work
Poor: The product has a bad quality and doesn't work at all
Doing The Plan
Criteria to Evaluate Products in Looks
Outstanding: The product looks exactly or better than the model shown in the book
Good: The product looks similar to the model shown in the book
Fair: The product doesn't look that much like the model shown in the book
Poor: The product looks nothing like the model shown in the book, and doesn't look attractive at all.
Criteria to Evaluate Products in Quality
Outstanding: The product has an excellent quality, and works properly
Good: The product has a good quality, and works
Fair: The product has a satisfactory quality, and doesn't quite work
Poor: The product has a bad quality and doesn't work at all
Final Rubric:
|
|
Essential Equipment:
- Needles
- Pins
- Sewing thread
- Thimble
- Embroidery scissors
- General scissors
- Dressmaker's scissors
- Measuring Tools
- Pencil
- Eraser
- Buttons
- Sewing Machine
Lavender Bag:
- 2 x 20cm squares of cotton fabric
- 35g dried lavender
- 1 small button
- 15cm narrow tape
- Paper and tracing paper
- Matching sewing thread
Coat Hangers:
- 20 x 65cm fabric
- Wooden coat hanger
- Padding: old tights or top cut into 10cm strips
- 60cm bias binding
- Matching sewing thread
Quilted Hottie:
- 50 x 60cm paisley fabric
- 50 x 60cm polyester or cotton batting
- 50 x60cm backing fabric
- 50 x 60cm binding fabric
- Matching sewing thread
- 50cm narrow velvet ribbon
- 1 x 12mm button
|
|
May 15, 2014
Learning To Use The Sewing Machine
Investigation
Learning To Use The Sewing Machine
Investigation
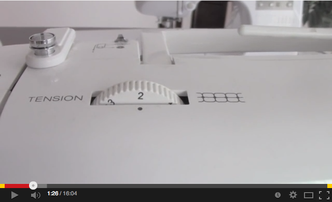
This is the tension switch, it will determine the tension of your stitches.
If you are using a fabric that is light and thready, you want to put it in a low tension.
If you are sowing on canvas or a thick material, then you want to put it in a high tension.
If you are using a fabric that is light and thready, you want to put it in a low tension.
If you are sowing on canvas or a thick material, then you want to put it in a high tension.
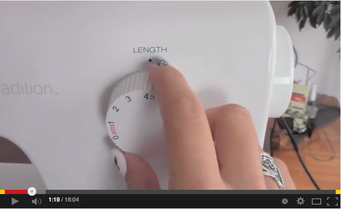
This is the switch that determines the length of your stitches.
The higher the number, the bigger your stitch
The higher the number, the bigger your stitch
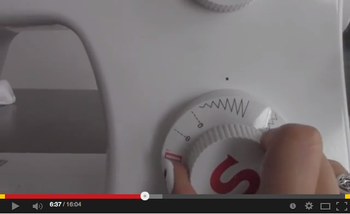
This switch determines what type of stitch you will use.
There are a variety of different stitches to use.
https://www.youtube.com/watch?v=xdHnrlrQ6RE
There are a variety of different stitches to use.
https://www.youtube.com/watch?v=xdHnrlrQ6RE
Tips For Beginners
The Back Stitch
To make sure your stitches are secure and won't come out, you want to lock your stitches, this will knot your threads in place, and your stitches wont move.
Sew a few stitches forward, then pull the reverse lever, and sew over your past stitches, this is the best way to secure them and make sure that they don't come out. After, just keep sewing forward normally.
http://www.makeit-loveit.com/2011/12/sewing-tips-practicing-your-sewing-stitches-including-the-back-stitch.html
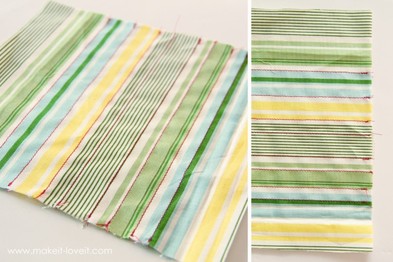
Sewing in Straight Lines
To be able to sew straight and steady, first you might need a little practice.
A good way to practice, is to sew over the lines of a striped fabric, or draw lines on a normal one.
After a little practice, your stitches will be much more steady and constant.
http://www.makeit-loveit.com/2011/12/sewing-tips-practicing-your-sewing-stitches-including-the-back-stitch.html
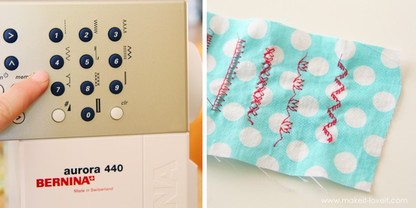
Test The different Types Of Stitches
Practice the different stitches your machine offers, play with the intensity and the lengths of the stitches until you find the perfect one.
http://www.makeit-loveit.com/2011/12/sewing-tips-practicing-your-sewing-stitches-including-the-back-stitch.html
Practice the different stitches your machine offers, play with the intensity and the lengths of the stitches until you find the perfect one.
http://www.makeit-loveit.com/2011/12/sewing-tips-practicing-your-sewing-stitches-including-the-back-stitch.html
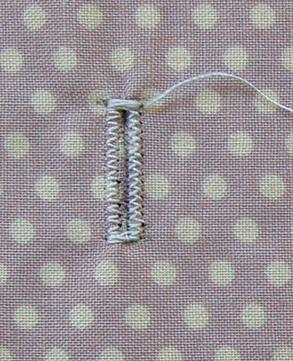
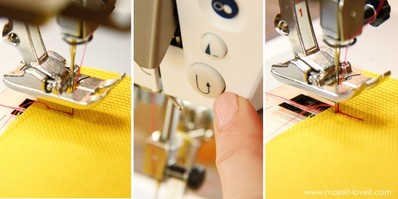
Making Eyelids (button holes)
This may seem really simple but actually its not that easy
Most of the machienes come with a special button or switch to make eyelids
This video teaches you how to make a button hole in four steps!
https://www.youtube.com/watch?v=y2D4wPqVg-A
http://www.purlbee.com/sewing-tutorials/2008/3/20/buttonhole.html
May 22, 2014
Testing And Exploring The Sewing Machine
_______________________________________________________________________________________________________________________________________________________________________________________________________________________________________________________________________________________________________
May 28, 2014
Learning How To Make The Patterns
Learning How To Make The Patterns
|
Accompanying the book I am using as a guide, comes a huge pattern sheet. What the pattern sheet does is it contains the patterns for all the projects in the book. The sheet is a bit confusing, and it took me quite a while to get to understand it, but it really helps to guide your projects. Each pattern is labeled with a different letter from A-Z , but appart from the core lines which mark the main shape of the project, there are other lines that cross the shapes, or round the squares or rectangles. The dotted lines that cross the shapes, are used to indicate alternative cutting lines to succeed in each project. The dotted lines that round the corners of squares and rectangles are used to know where the corners should be folded if you choose to have rounded corners.
|

|
June 9, 2014
Shopping For Fabrics
Before starting to sew the projects, it was essential that I found the perfect fabrics for each project. To find the perfect fabrics I created specifications for the fabrics for each project, this would help me know what I was looking for on fabrics.
Specifications For Fabrics
Lavender Bags Fabrics:
- 2 x 20 cm fabric
- 100% cotton
- Soft pastel colors
- With designs (preferably flowers)
Coat Hangers Fabrics:
- 20 x 65 cm fabric
- Design filled fabrics (Meaning the whole fabric has designs)
- Different colors that combine together
Quilted Hottie Fabrics:
- 50 x 60 cm fabric- paisley fabric or bedspread material if possible
- Thick and stiff
- Filled with small neutral designs (not too charged)
- A variety of colors
Before going to shop for fabrics, I was a bit nervous and unsure of what where the best fabrics I could use to make the specific products I wanted to. Therefor, I conducted a small research into how to know what fabrics to use. There actually isn't a fabric that is considered to be the best, due to that it all depends in what you are sewing. In my research I found this webpage that gave you 10 tips to be able to find the best fit fabric for the product you are sewing. This webpage was a lot of help!
http://nicolesclasses.com/sewing-101-choosing-fabric/
Following the recommendation of the seamstress Mirta, I went to look for fabrics at Gamarra. I encountered a variety of different fabrics, but none of them seemed to fit my specifications. After looking for a while I finally found the flowery fabrics I was looking for, I chose six fabrics of different colors and designs. Unfortunately I wasn't able to find the correct fabric needed for the quilted hottie.
|
June 12, 2014
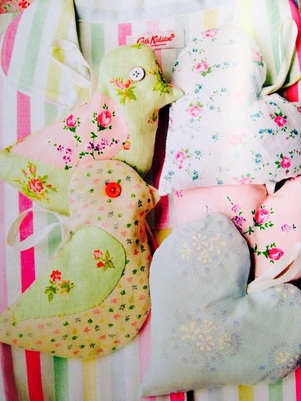
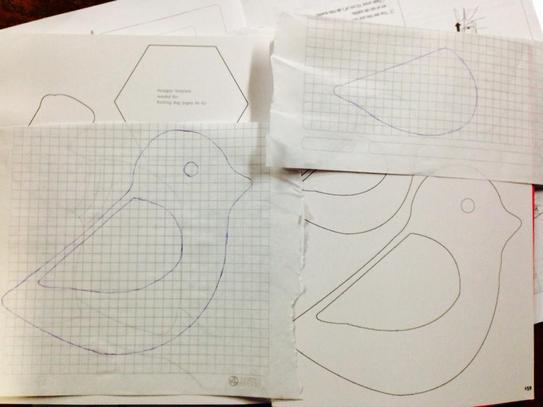
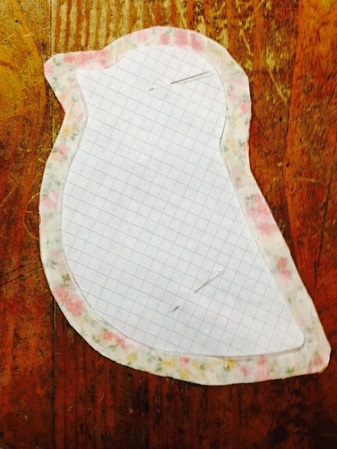
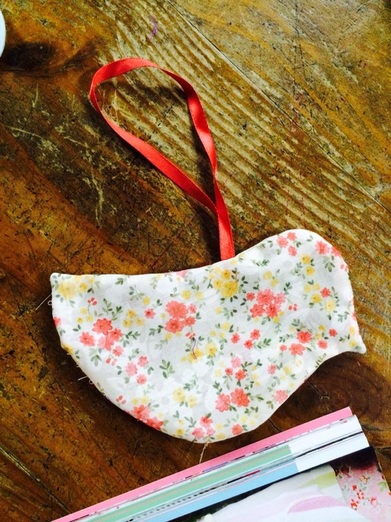
Making the patterns and beginning to sew Today I actually began to work on the projects, like stated in my plan, I began working on the lavender bags first. The lavender bags are little bird structures filled with foam, and lavender scented bags. What I am trying to obtain is something similar to the birds in the picture at the right -----------------------------------------------> Honestly today in my session with Mirta, I was a bit disapointed. Previously I had been really exited about starting to sew, and use the machine, etc, but it turns out that sewing wasn't what I expected. Sewing is actually a very long and complicated process, where every little detail matters. In today's two hour session, the one of the only things I did was make the patterns, and copy them, on paper, on fabbric, leaving two cm, everywhere. I'm not a really good artist, nor have a good hand writting; this task was a major challenge for me, due to that I lack of those precision skills. Still after various failed attempts I was able to successfully complete all the patterns that I was aiming for.
|
|
|
|
|
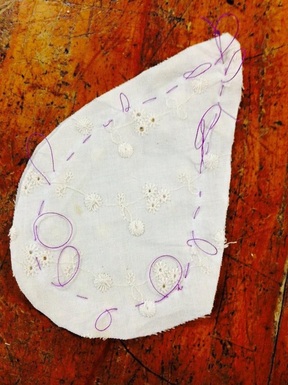
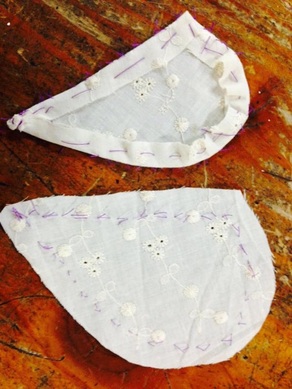
The other thing I did aside from making the patterns, was to start sewing the wings. After I finally finished copying all of the patterns I needed, I started sewing the wings. Still this process wasn't how I had imagined it eather. There is a lot of math involved, which is something I didn't really enjoy. I felt like while doing the wings I began to loose interest, due to that I had sewed in the same place many times, and still none of those stitches where the actual ones. Mirta explained to me that eventually the sewing process could be very long and tiering, but that eventually it would get better ahead. Right now I am feeling a bit lost, due to that all of the research I had done before, and the prior knowledge I had, turn out to have nothing to do with what I am doing now.
|
|
|
July 24, 2014
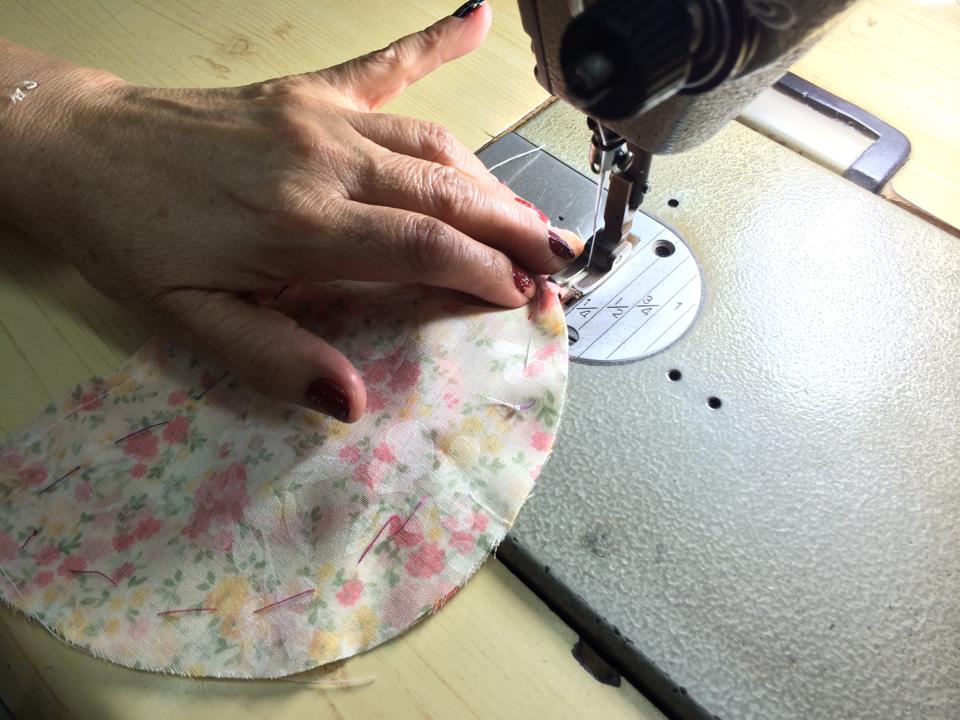
Sewing the pieces together My plan states that by August 5 I should be done with the lavender bags, it is July 24 and I wasn't even close to being done, therefor today I worked for more than three hours. Today I finally started to see how the bird was going to turn out. At first I was a little confused when Mirta asked me to sew both fabrics together backwards (the wrong side of the fabric), but then I realized the technique that we where using. I have discovered how costure is really strategic, and it is all about achieving a clean project with no glitches. I'm really liking this part of the project, because I am finally getting some sense of what Im doing. Today I also used the sewing machine (I was really exited) even if it was just for 5 minutes; I was really glad my research actually served for something. |
|
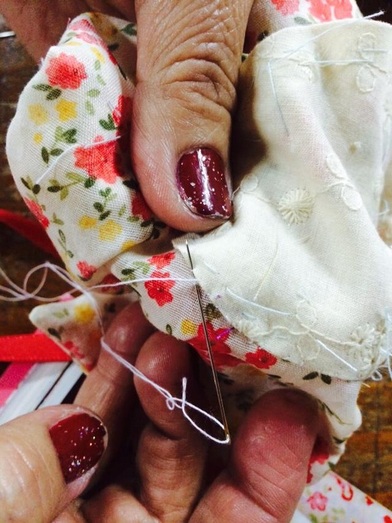
The hardest part of sewing came when I was asked to sew the wings by hand into the bird. The stitches where required to be placed on the border edge of the wing. Today I got to see Mirta's dark side........ she is an extreme PERFECTIONIST! Every time there was one stitch that was crooked, too short, or too long, she would make me remove all of the stitches and do them again, so they would all look the same. This has definitely been the hardest day until now, but I actually enjoyed it. After I finished sewing the wings, I got a great feeling of achievement that was very rewarding, and actually the bird has started to look very nice. Right now I am much more calm, because now I only need to do the final touches.
|
|
August 3, 2014
Finishing up
Finishing up
|
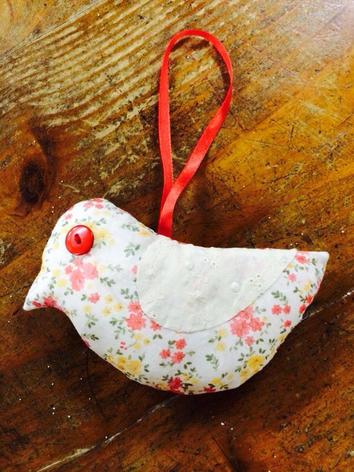
For today, basically the whole bird was already allready finished. My goals for today where to: sew the buttons that would serve as eyes, fill the bird with stuffing, insert the lavender smell, and close it by sewing it. Though it feels amazing to have finished the first project, I still feel like the bird could be improved, there is something that is not quite perfect. I think it is the eye, I chose to make it red because it matched the fabbric, but now I see that it doesn't look so well on it. Maybe later on I should change the eye, for a smaller one, made out of a lighter color.
|
|
August 7, 2014
Reflection of Process
_______________________________________________________________________________________________________________________________________________________________________________________________________
Reflection of Process
_______________________________________________________________________________________________________________________________________________________________________________________________________
August 12, 2014
Making the patterns and measuring fabrics
Making the patterns and measuring fabrics
|
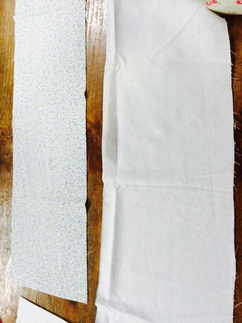
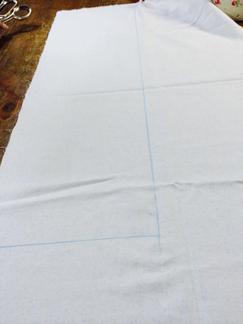
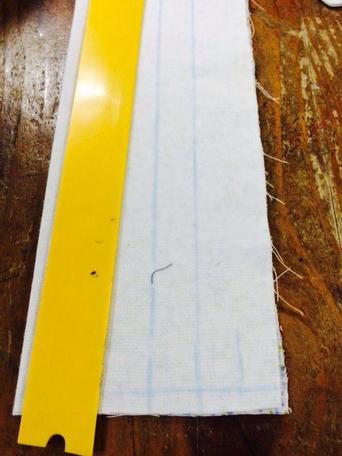
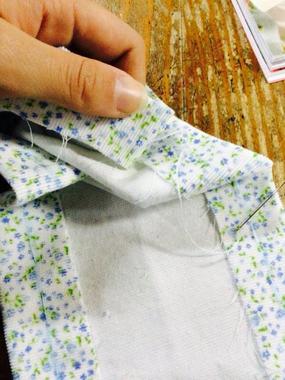
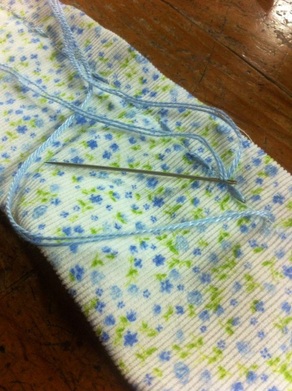
Today I finally started making the coat hanger. To use, I chose the thickest fabric I had, this would give the coat hanger a more voluptuous effect. Also according to the specifications for the coat hanger fabric, the fabric should be filled with designs, but should not look too charged. The fabric I chose is filled with small blue and green flowers, but like the colors are smooth, it doesn't look too charged. I was a bit surprised when I started doing the coat hangers, due to that it was a big step to go from the lavender bags to this. Just the structure of the coathanger was complicated, there was a lot of folding and measuring to do. It took me a lot of time to figure out what I was doing , because there where so many lines that I got confused. At first I didn't know what I was doing, but I just followed what the book said, but when the fabric began taking shape, i started to get a sense of what I was doing.
|
|
|
|
|
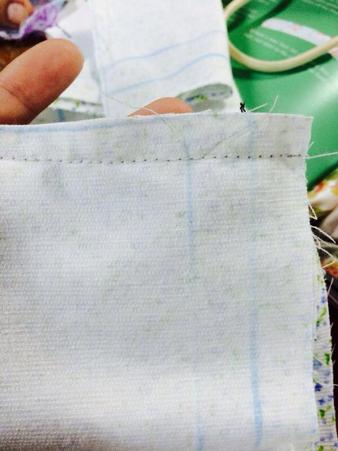
This part got so complex at one point, that I got confused and sewed a fabric that I wasn't supposed to, and I had to re-do the whole pattern again with another piece of fabric. This helped me learn how its really important that you are alert when working, because sewing is all about precision and details. When I finished this part, everything just got easier.

|
|
|
August 24, 2014
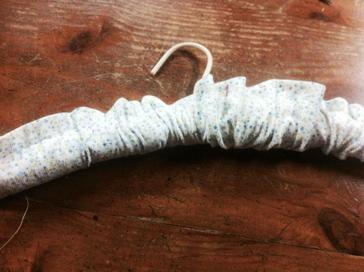
Sewing It Up Plus Applying The Final Details Today has been the hardest day of work until now. Though everything was pretty much done with the coat hanger, the final touches still needed to be made, and required a lot of patience (which I lack of), and persistence. I started off sewing together both sides of the case with the sewing machine, this stitches would serve to make the coat hanger more resistant and stiff. I sew from the sides going into the middle leaving a big hole in the middle with the purpose of fitting the coat hanger inside. Then, it was time to apply the real stitches, this stitches are what give the coat hanger the wrickled/crumbled effect. This stitches had to be done with "hilo perlé", this thread is extreamely thick, so its purpose would be to give the coathanger a decorative touch. Aparently, due to the thread's thickness, it was very hard to sew with it, specially in a fabric that was so stiff like mine. Also I had a very hard time keeping the stitches straight, and pinched my finger several times. Mirta, the seamstress that was helping me is a perfectionist, she demanded work of high quality, so everytime one stitch was not straight, too small or too long, she made me take it out and do it again. I am really happy because as you can see I am several days ahead of my plan, the coat hangers should be ready for September 5, and I have them ready now. I am not sure if I will use these extra days to take a break, or maybe I will go ahead of my plan to avoid days of stress after. |
|

|
|
September 3, 2014
Reflection On Process
______________________________________________________________________________________________________________________________________________________________________________________________________________________________________
Reflection On Process
______________________________________________________________________________________________________________________________________________________________________________________________________________________________________
September 13, 2014
Selecting The Fabric And Starting To Work
Selecting The Fabric And Starting To Work
|
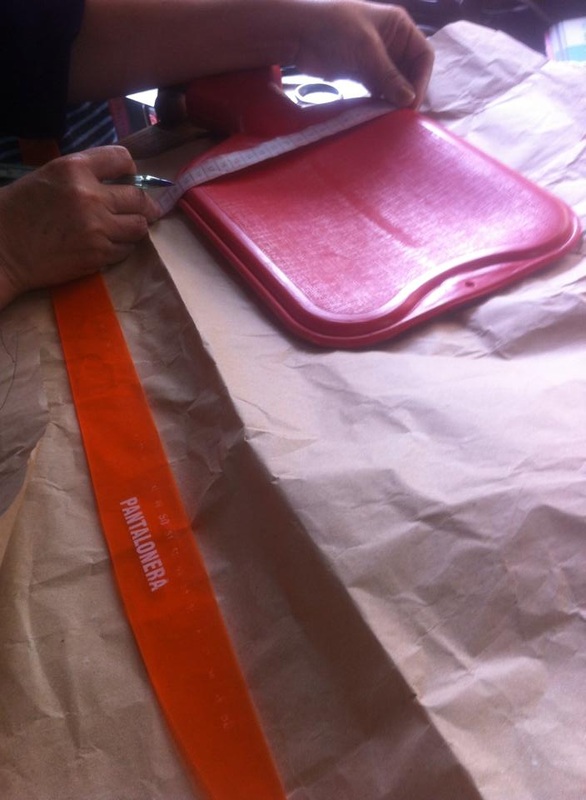
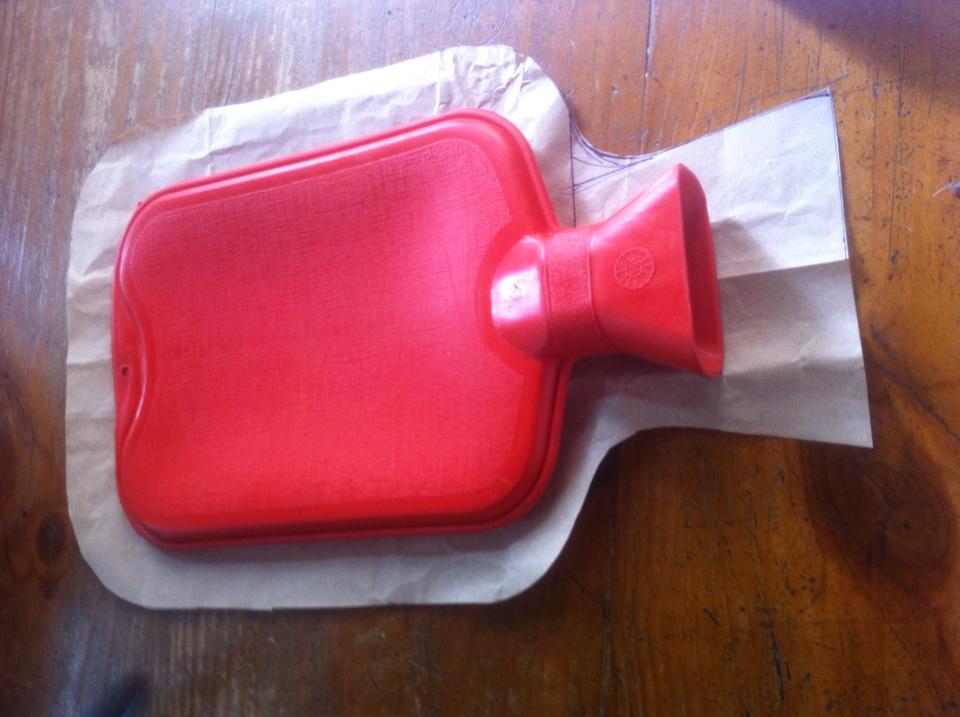
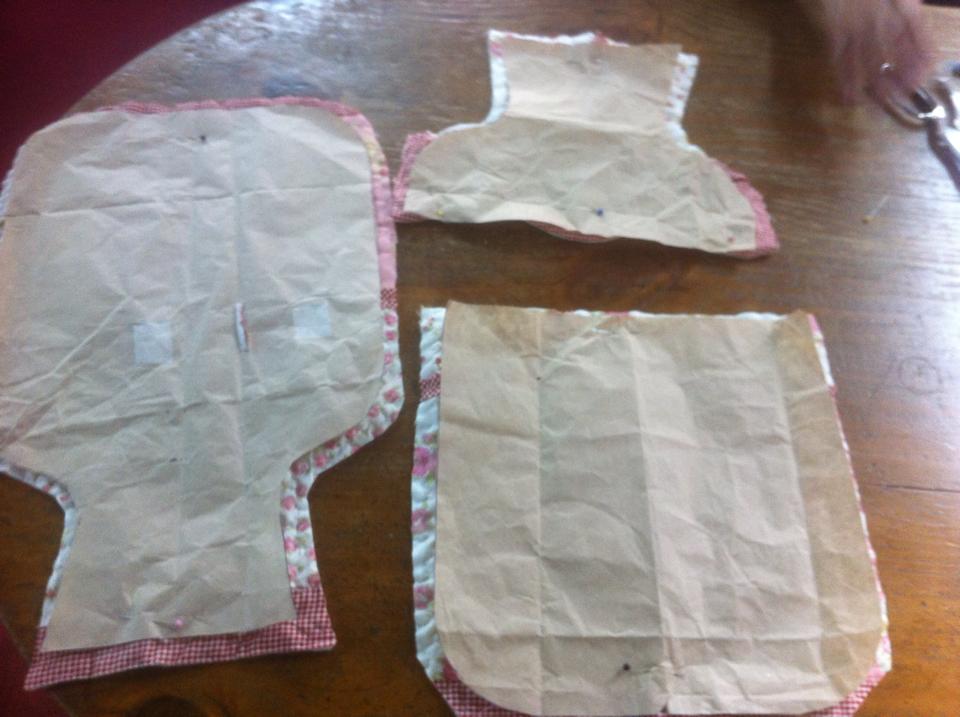
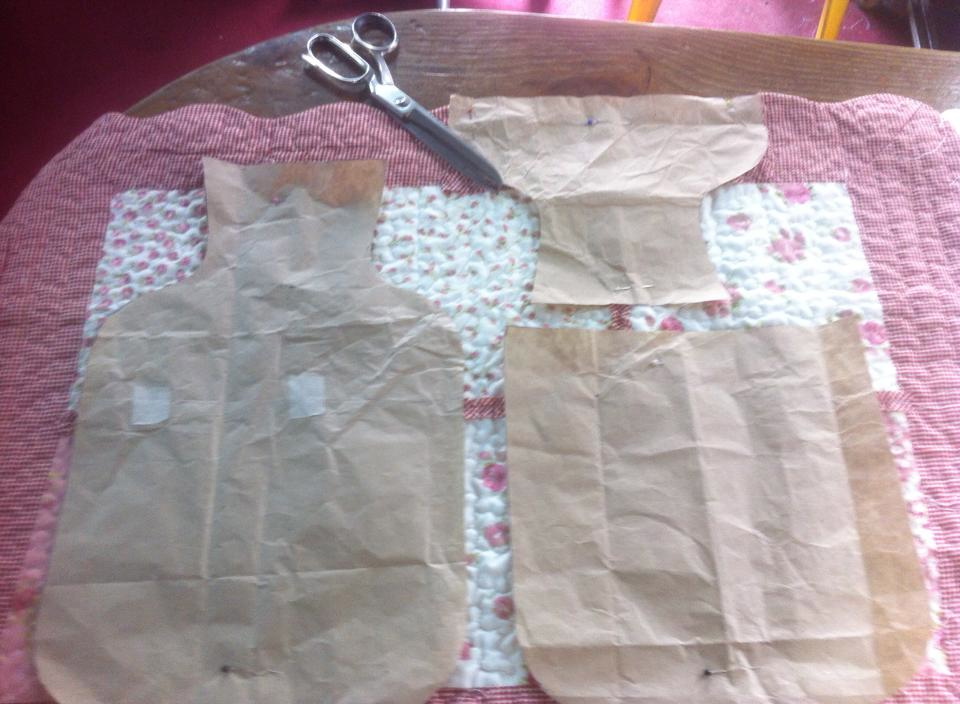
Today I finally found the perfect fabric for the hot water bottle. After a week of intense shopping for fabrics, I finally found the perfect one; a flowered printed pillow cover that as soon as I saw it, I knew it was the best fit for my project. It's been a long time since I finished the coathanger, and I'm a little behind schedule, this is why I went to see Mirta as soon as I could. I started working imediately, I started off by measuring the hot water bottle I was going to use, and started playing with the fabric. I did the patterns, which where pretty confusing due to that I had to calculate how much the hot water bottle would expand with water inside, but still I was able to complete them successfully.
|
|
|
Here's the link to my written report
https://docs.google.com/document/d/1rhXlUg7g-Jq1h-aKRptmF1jLc4SSWnYYA2QTMzioLVw/edit?usp=sharing
https://docs.google.com/document/d/1rhXlUg7g-Jq1h-aKRptmF1jLc4SSWnYYA2QTMzioLVw/edit?usp=sharing
